Detailing Pricing Table: How to Show Your Packages So Visitors Can Compare and Book
How to lay out a detailing pricing table people can compare on a phone: three columns, one row order, from prices, vehicle sizes, add-ons and a book button on every tier.


A good detailing pricing table shows three packages side by side, highlights the one most people should pick, lists what’s included in the same row order in every column, and puts a “from” price and a book button on each package. On a phone, the columns become stacked cards and the button stays within reach. The whole job is to help a visitor compare in seconds and act without sending you a “how much?” message first.
This guide is about presentation, not about choosing what goes in each package or what to charge. If you still need to settle those, start with our guides to building a detailing service menu and setting car detailing prices. Then come back here for a layout you can copy, wording for the fine print, a phone checklist, a plain-text template and the mistakes that make a table harder to use than a simple list.
No website yet? Our car detailing website builder makes one from two answers, free, with call, text and quote buttons ready for phone visitors.
What Should A Detailing Pricing Table Do?
Most visitors to a detailing site are asking three questions: what do you do, roughly what does it cost for my car, and how do I book. A pricing table answers the second question and points straight to the third. If it raises new questions instead, like “is my SUV extra?” or “does the middle one include the interior?”, it isn’t doing its job.
Answer The Price Question Early
Think of your pricing table as a decision aid, not a brochure. A visitor should be able to look at your detailing packages, spot the one that fits their car and budget, and tap a button without reading a paragraph. Showing at least a “from” price also filters out people who were never in your range, so the messages you do get come from customers who already know roughly what to expect. That saves you time on every enquiry, and it saves them an awkward conversation.
Pass The Four Simple Tests
Run any table you build through four quick tests. The scan test: can someone tell the packages apart in five seconds? The fit test: can they find the price for their vehicle size without asking? The trust test: is it clear what could change the price, and why? The action test: is there a button to book or ask for a quote next to every price? If any answer is no, fix that part before you worry about colors, fonts or icons.
Build Trust With Honest Prices
A clear table tells people you run an organized business with no hidden surprises. That only works if the prices you show are honest. The FTC’s Advertising FAQs for small business says price claims are held to the same truthfulness standards as any other claim, and that disclosures need to be clear and conspicuous rather than buried. Fine print can’t contradict the headline. This is not legal advice, so check the guidance or ask an attorney if you’re unsure about a specific claim.
Done-for-you websites
Want your website built for you?
ReadySite writes the wording, builds up to 5 pages and sets up your Google Business Profile. $299 one time, and you see a free preview before you pay.
Key Elements Of A Detailing Pricing Table
Every strong detailing pricing table is built from the same few parts, whatever your detailing packages are called. Get these right and the rest is mostly styling. Get them wrong and even a beautiful design leaves visitors scrolling back and forth, then messaging you to ask questions the table should have answered.
Three Columns With One Highlight
Three columns is the format most owners land on, and for good reason. Two packages feel like a yes or no choice. Four or more makes the table wide, crowded and slow to compare on a phone. Order your detailing packages from the smallest job to the most complete, then mark the one you’d recommend to most customers with a small label, a slightly stronger border and a solid button while the others use outline buttons. For many detailers that’s the middle one.
Only use a label you can stand behind. “Most booked” should be true for your business. If you’re new, “Recommended” or “Best for most cars” is the honest choice. Highlight one column only, because two highlights cancel each other out. The point of the highlight is to make the choice easier, so it should match the package you’d honestly suggest to a friend with an ordinary car. If your bookings later show that a different package is the real favorite, move the label in your pricing table.
Keep The Top Of Each Column Identical
Each column should open with the same four elements, in the same order: a short package name of two or three words, a one-line “best for” description like “Daily drivers between full details,” the “from” price large enough to read at a glance, and the button. Put the button near the top as well as at the bottom of a long column. People who already know what they want shouldn’t have to scroll past the checklist to book.
A Fixed Row Order For What’s Included
This is where many a pricing table falls apart. One column says “Hand wash,” the next says “Exterior wash and dry,” and the third skips it. Nobody can line them up, so nobody can compare. The fix is one master list of every service in any package, used in that order in every column. A package that doesn’t include a row shows “Not included” instead of dropping the line. Group rows by area, use customer words like “Seats and carpets shampooed,” and keep it to six to ten rows.
If you work mobile, add a “typical time on site” row to your detailing pricing table. It sets expectations and quietly explains why the top package costs more. A customer who sees “about 2 hours” next to “about 5 hours” understands the price gap without you saying a word, and knows how long to keep the driveway clear on the day.
Ticks, Crosses Or Words
Check marks and dashes are quick to scan, but icons alone can be unclear to screen readers and to people skimming in bright sun. Use a tick with a short text label, or plain “Yes” and “Not included.” If you build the table as a real HTML table, the W3C’s tables tutorial explains why header cells need proper markup so assistive technology can read each row and column correctly. Most website builders handle this for you when you use their own table or pricing block.
Put together, these elements let someone compare your detailing packages at a glance, whether your pricing table is plain or styled. The row order does most of the work, so write it down once and reuse it everywhere, including on your service pages.

How To Show Prices, Sizes And Add-Ons
Prices for detailing packages change with the vehicle, and visitors know it. The question is how to show that without turning your detailing pricing table into a grid of twelve numbers. A few simple rules handle “from” prices, vehicle sizes, extras and the fine print that explains them.
Use From Prices Honestly
A “from” or “starting at” price tells people the lowest they’ll pay for that package. Make every “from” price in your pricing table a price a typical small car in normal condition actually pays. If almost every job ends up higher, the “from” price is misleading, and customers will feel it at the door. Ceramic coating usually needs its own pricing logic, based on paint correction, coating years and vehicle size, so keep it out of your main table. Our ceramic coating pricing guide covers how to structure it.
Three Ways To Handle Vehicle Size
Size tabs above the table, such as Car, Small SUV and Large SUV, truck, van, swap the prices in all three columns and keep the table clean. Price lines inside each column, like “SUV from $X,” work everywhere with no interactive features. A single note under the table, “SUVs add $X, trucks and vans add $X,” is simplest but makes people do the math. Whichever you pick, define the sizes. A line like “Compact SUVs priced as cars” saves a lot of messages.
Example (illustrative): a mobile detailer uses tabs labelled “Car,” “Small SUV” and “Large SUV, truck, van.” The default tab is Car. Under the tabs sits one line: “Not sure? Pick the closest size, and I’ll confirm when I see the vehicle.” Replace the labels and the wording with your own. The important part is the reassurance line, because it tells people that picking the wrong size won’t cost them anything. It keeps them moving through your detailing packages instead of stopping to message you about whether their crossover counts as an SUV.
Put Add-Ons Below The Table
Add-ons are extras a customer can attach to any of your detailing packages: pet hair removal, headlight restoration, engine bay, odor treatment. Inside the columns they make every package look longer and more confusing, so put them in a short list directly under the table with a heading like “Add to any package.” Each line needs a name, a short “what it fixes” phrase and a price. Keep it to six or eight items. If an add-on is already in the top tier, say “Included in Full Detail” so nobody pays twice.
Fine Print You Can Adapt
Fine print should explain what could change the price, in plain words, right next to the prices. Keep it to three to five lines. For example: “Prices are starting prices for vehicles in normal condition. Heavy pet hair, sand or stains may add [$X]. I’ll confirm the price before I start.” Add lines for vehicle size, your mobile service area and any travel fee, the water or power you need, and reschedule notice. Each line names the condition, states the effect and says when the customer will know.
“I’ll confirm the price before I start” does a lot of work for trust. If you charge condition fees, keep that line close to the prices, not on a separate terms page that nobody opens. Put the fine print in normal text size directly under the pricing table, not in a pale gray font at the bottom of the page. Clear fine print protects you as much as the customer, because it gives you something fair to point to when a heavily soiled car needs extra time.
Benefits Of A Phone-Friendly Pricing Table
Most people will see your detailing packages on a phone, often while standing next to a dirty car in a driveway. A three-column table that looks great on a laptop can turn into tiny text or a sideways mess on a small screen. Planning the phone layout of your pricing table on purpose pays off in fewer questions and faster bookings.
Stacked Cards That Stay Readable
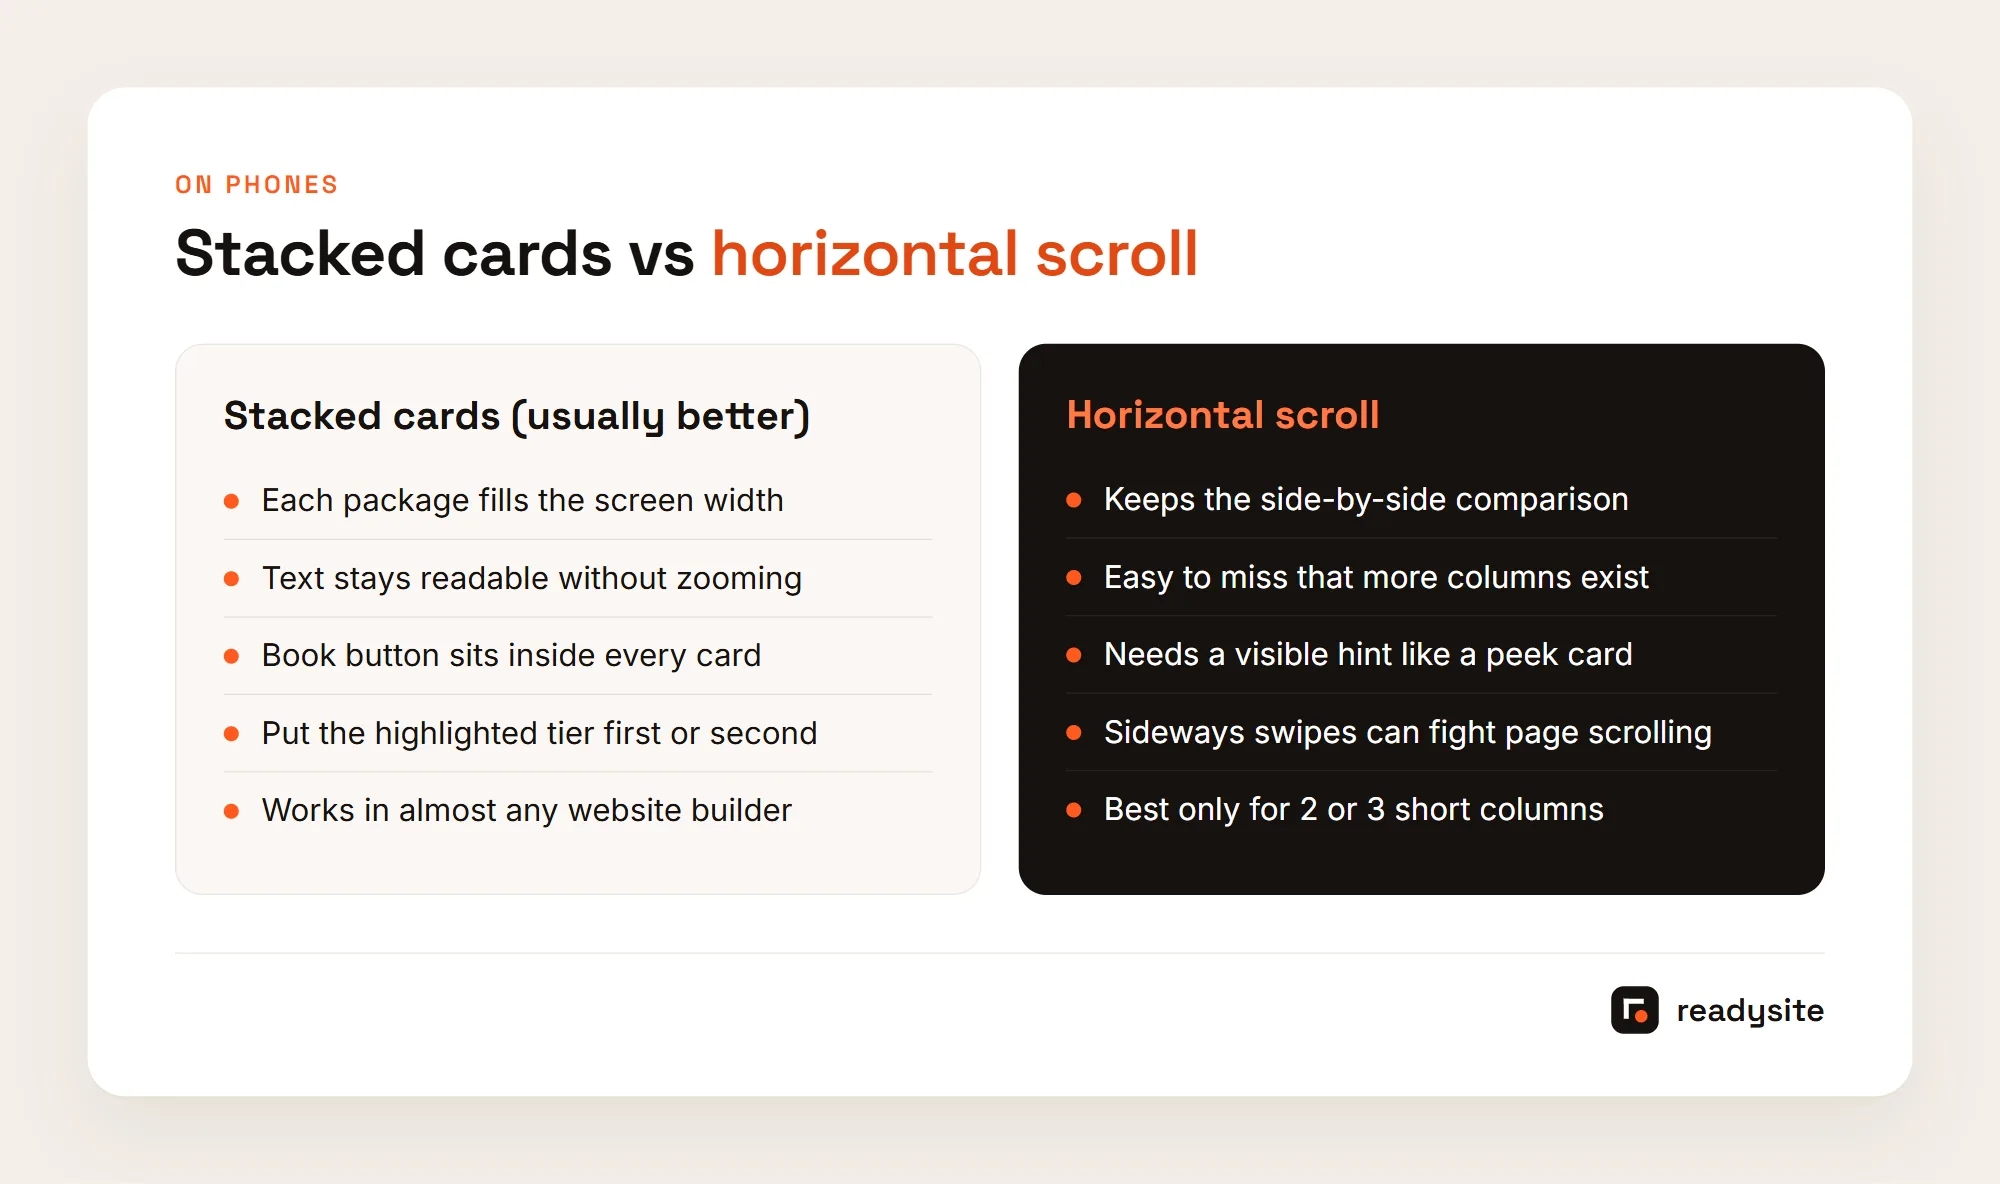
The two common patterns are stacked cards, where each package becomes a full-width card one under the other, and horizontal scroll, where the table keeps its columns and visitors swipe sideways. For most detailing sites, stacked cards are the safer default for a detailing pricing table. Text in a stacked pricing table stays readable without zooming, and many visitors never notice hidden columns in a scrolling table. Consider showing the recommended package first on phones, and rely on the fixed row order so people can compare by scrolling.
A Book Button On Every Tier
Every package in your pricing table needs its own button. A visitor who has just decided “the middle one, for my SUV” shouldn’t have to scroll to the top to find your number. Use the action, not a vague label: “Book Signature Detail” or “Get a quote for this package” beats “Learn more.” If you don’t take online bookings, say “Text me to book.” Point each button to one destination you actually answer. Our detailing quote form guide covers which fields to ask for.
Buttons Within Thumb Reach
On a long phone page, a slim bar fixed to the bottom of the screen with “Call,” “Text” or “Get a quote” keeps the next step within thumb reach. Keep it small enough that it doesn’t cover content, and don’t stack it on top of a chat bubble. The W3C’s guidance on minimum target size sets 24 by 24 CSS pixels as a floor and recommends larger targets for important controls. Booking buttons are about as important as it gets, so make them full width on phones.
A phone-friendly pricing table isn’t about fancy design. It’s readable text, consistent rows and a button that is always close by. Keep the button style consistent too: solid on the highlighted tier and a lighter version on the others.
How To Build Your Detailing Pricing Table Without Code
You don’t need a developer or a plugin to build a detailing pricing table. Most website builders give you columns, cards or a pricing block. The order you build things in matters more than the tool, and the steps below work in nearly any builder.
Draft Your Packages In Plain Text
Write each column of your detailing pricing table out before you open any builder. For each package, note the name, a one-line “best for,” the “from” price with its size, the button wording, the rows marked yes or not included, and the time on site. Mark the middle column with its label. Below the table, list your add-ons with prices, your three to five lines of fine print, and a help line such as “Not sure which package? Text me a photo of your car and I’ll suggest one.” Read it all out loud and fix anything unclear.
Build One Column, Then Duplicate It
Add a three-column section, using the builder’s pricing block if it has one or a row of three cards if not. Build one column completely: name, best-for line, price, button and rows. Check it in the phone preview, then duplicate it twice and change the text. Duplicating keeps spacing, fonts and row order identical. Style the highlight on the middle column only, add your size tabs or price lines, then the add-on list and fine print. Finally, connect every button and test each one.
Decide Where The Table Lives
On a one-page site, put the pricing table after your services intro and before reviews. On a larger site, a short homepage version can link to a full pricing section, and separate detailing service pages can show each package in context. ReadySite’s editor lets you lay out your packages, add-ons and service area, with click-to-call, WhatsApp and a quote form built in. You can build your car detailing website free and see how the Apex Auto Detailing example site handles it.

Fix The Common Mistakes Before Publishing
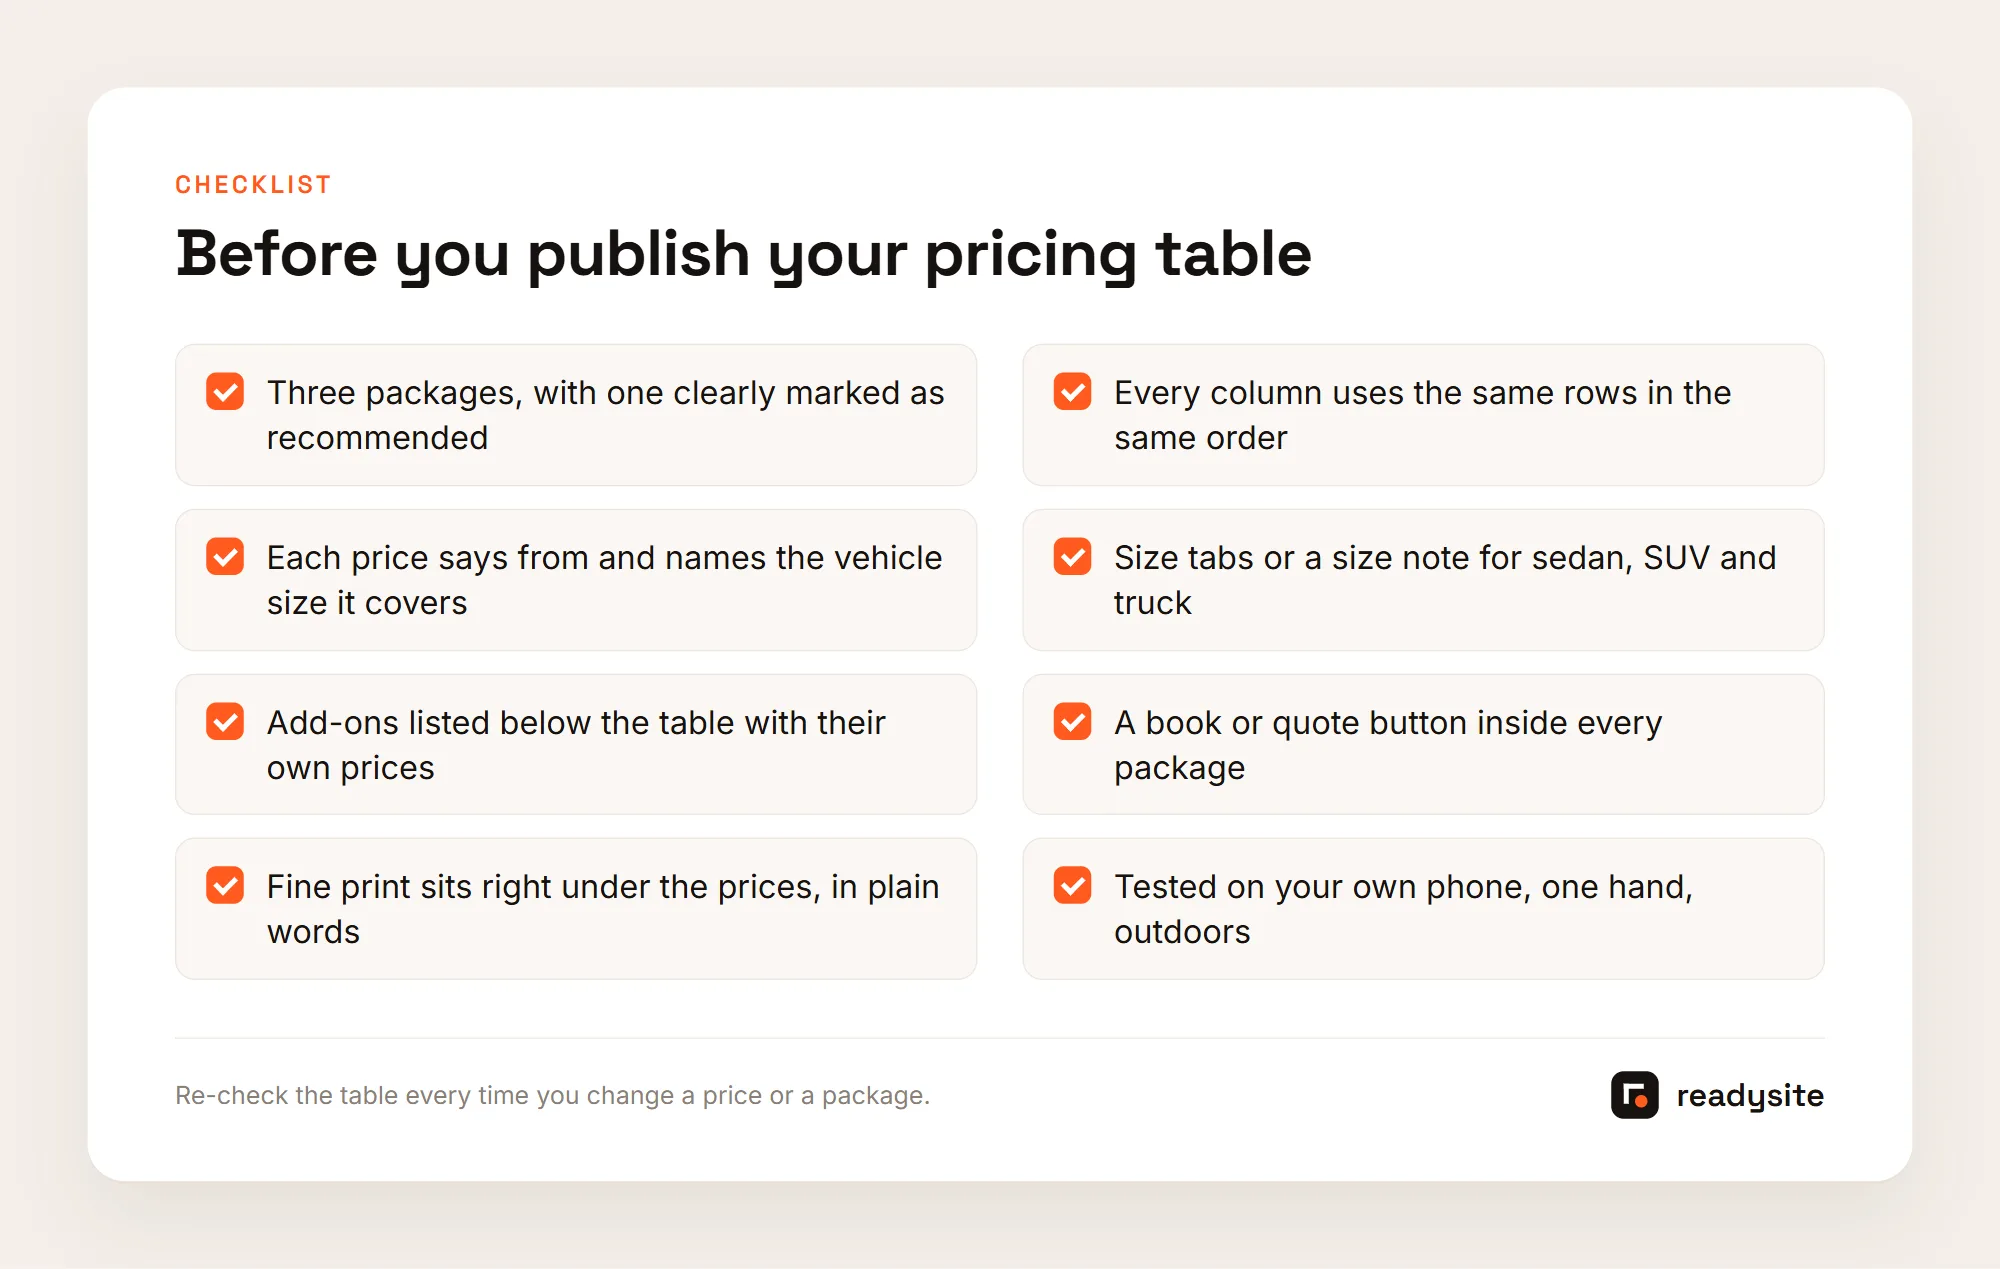
Watch for different rows in every column, too many detailing packages forcing tiny text, “call for pricing” on everything, a “from” price nobody pays, and no vehicle size information. Buttons only at the top of the page and fine print on another page cause trouble too. Don’t publish the table as an image, because prices in a picture can’t be read by screen readers or search engines and are hard to update. And make sure your prices match your Google Business Profile and social pages.
Then open the pricing table on your own phone, outdoors, in one hand. Can you read every price in your detailing pricing table and switch sizes with your thumb? Does each button open the right app? Five minutes catches most problems. For a wider review, see detailing website mistakes.
Conclusion
A clear detailing pricing table is mostly about consistency, not design skill. Three packages, one honest highlight, the same rows in every column, “from” prices with vehicle sizes, and a book button on every tier. Add your extras and fine print right below, and make sure the whole thing reads well on a phone held in one hand. Take your current packages and write them out in plain text tonight, then build one column, duplicate it and test it.
Rather have someone set it up for you? Request a free preview of a done-for-you site. For $299 one time, ReadySite writes the wording for up to 5 pages and lays out your packages, and you only pay if you like what you see.
Done-for-you websites
Want your website built for you?
ReadySite writes the wording, builds up to 5 pages and sets up your Google Business Profile. $299 one time, and you see a free preview before you pay.